
Ripple Chocolate Chip Cookies
Crisp, rippled edges. Gooey chocolate centers. And yes, you get to bang the pan on purpose.
There are chocolate chip cookies, and then there are chocolate chip cookies with edges. These are the latter.
Brown butter gives the dough a deeper, nuttier flavor, chopped chocolate creates little puddles throughout the cookies, and repeatedly dropping the baking sheet while they bake creates those thin, dramatic ripples around the edges.
The result is my favorite kind of cookie contrast: crisp and caramelized around the outside, soft and chewy toward the middle, with chocolate basically everywhere.
And arguably the best part? Making them requires you to repeatedly bang a hot sheet pan against the oven rack.
Very therapeutic. 😂
A Note About Pan-Banging
The dramatic ripples come from a technique often called pan-banging: while the cookies are baking and puffed, the baking sheet is lifted slightly and dropped against the oven rack. That sudden impact causes the centers to fall and pushes the dough outward, creating a new ridge around the edge.
Repeat the process as the cookies continue to puff, and you get multiple concentric ripples.
The technique has become especially well known through baker and cookbook author Sarah Kieffer, whose pan-banging chocolate chip cookies helped popularize the method.
For these cookies, we’re pairing that technique with brown butter, a high ratio of chopped chocolate, and a soft center for my version of the ultimate ripple cookie.
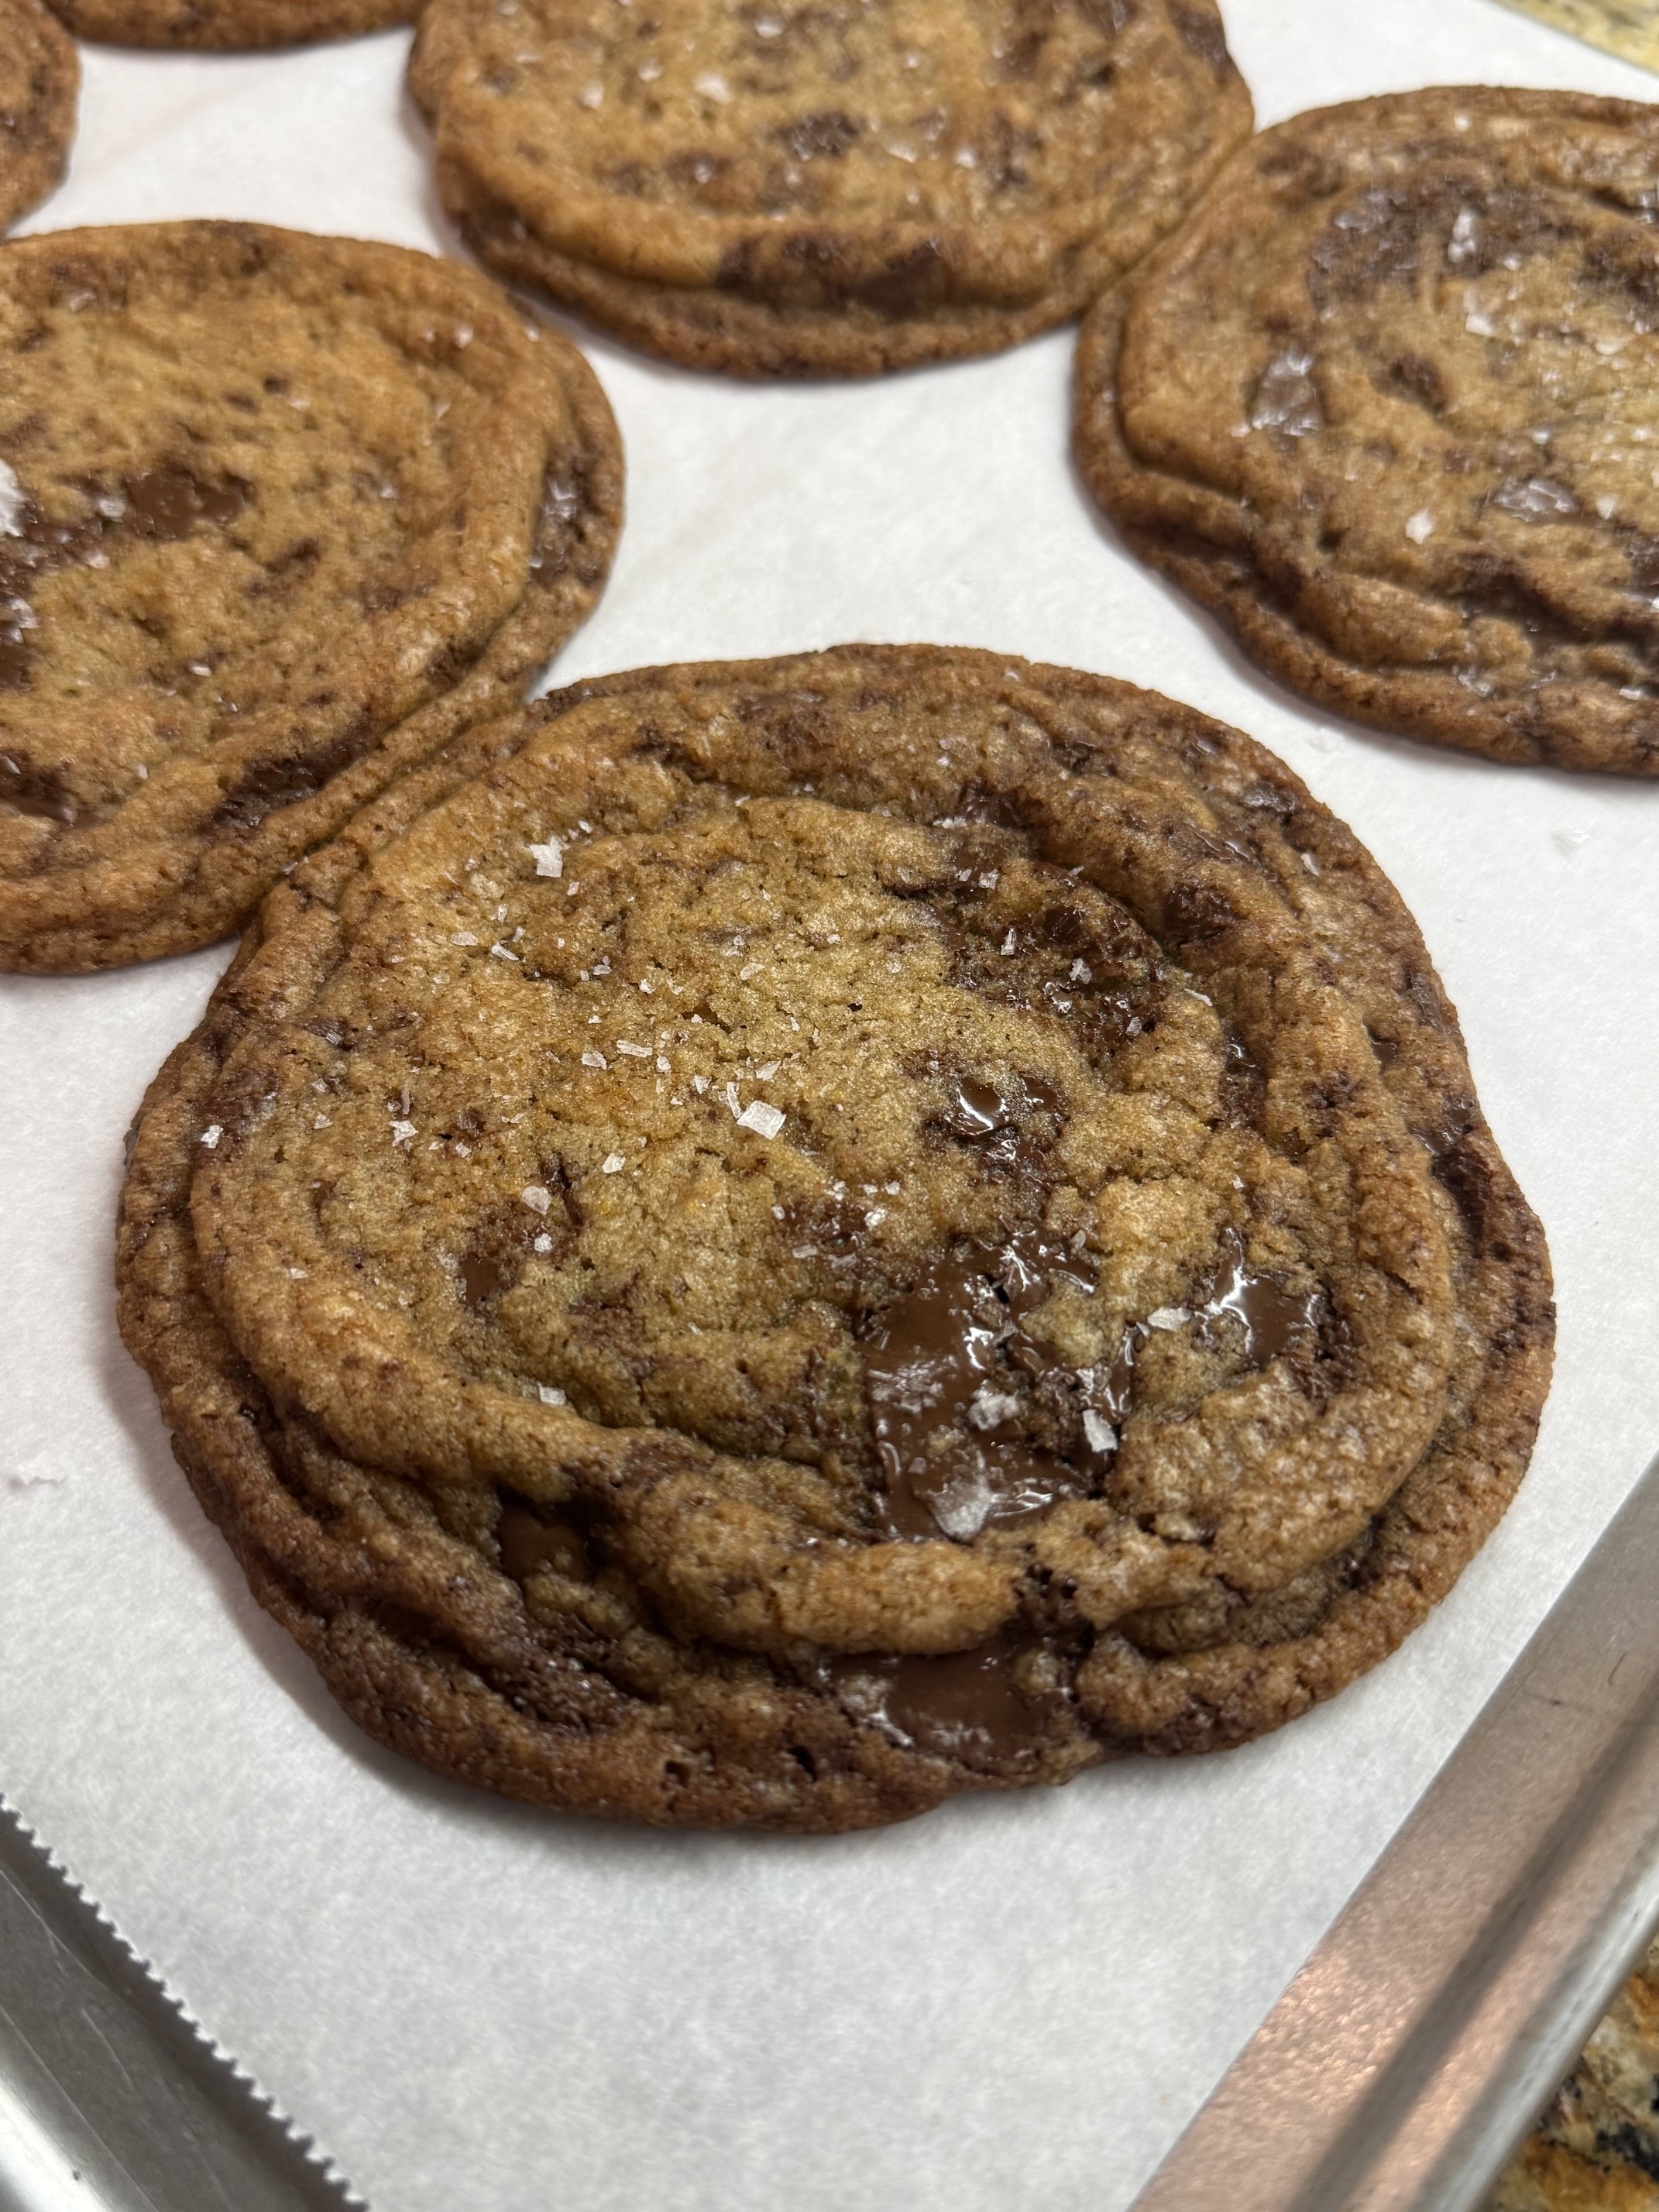
Ripple Chocolate Chip Cookies
Yield: Approximately 12–14 cookies
Prep time: About 25 minutes
Bake time: Approximately 10–12 minutes per tray
Oven: 350°F / 175°C
Ingredients
170 g (¾ cup) unsalted butter
150 g (¾ cup) granulated sugar
110 g (½ cup packed) light brown sugar
1 large egg
1 large egg yolk
2 teaspoons vanilla extract
185 g (1½ cups, spooned and leveled) all-purpose flour
½ teaspoon baking soda
¾ teaspoon kosher salt
170 g (6 ounces) semisweet or dark chocolate, roughly chopped
Flaky sea salt, optional, for finishing
Make the Brown Butter
Place the butter in a light-colored saucepan or skillet over medium heat.
Allow it to melt, then continue cooking. The butter will foam and sputter as the water cooks away. Stir or swirl the pan frequently so the milk solids cook evenly.
Eventually you’ll see little golden-brown flecks forming at the bottom of the pan and the butter will smell deeply nutty and toasted.
As soon as those milk solids are a rich golden brown, remove the pan from the heat.
Pour the brown butter—including all those delicious browned bits—into a heatproof mixing bowl.
Let it cool until it’s warm rather than piping hot. You don’t want to cook your egg when it goes in.
Make the Cookie Dough
Add the granulated sugar and brown sugar to the browned butter and whisk until thoroughly combined.
Add the whole egg, egg yolk and vanilla. Whisk until the mixture looks smooth and glossy.
In a separate bowl, whisk together the flour, baking soda and kosher salt.
Add the dry ingredients to the butter mixture and fold until there are only a few streaks of flour remaining.
Add the chopped chocolate and finish folding just until everything is evenly distributed.
Don’t keep mixing once the flour has disappeared.
Portion the Cookies
Line baking sheets with parchment paper.
Portion the dough into approximately 45–50 g balls.
Give these cookies plenty of room. They need space to spread in order to create those thin ripple edges, so don’t crowd the baking sheet.
If your dough feels unusually warm or loose from the brown butter, give the portioned dough a brief chill before baking. You don’t want it rock-hard—you just don’t want warm, greasy dough hitting the oven.
Bake—and Bang the Pan
Heat the oven to 350°F / 175°C.
Bake one tray at a time for the most predictable results.
After approximately 6 minutes, the cookies should have spread and puffed in the center.
Wearing oven mitts, lift the baking sheet slightly from the oven rack and drop it back down firmly against the rack.
The puffed centers should collapse.
Continue baking for approximately 2 minutes, until the centers puff again.
Drop the pan again.
Give the cookies another 1–2 minutes and repeat once more if they’ve puffed enough to create another ripple.
You’re essentially creating this cycle: puff → drop → ripple → puff → drop → ripple (Exact timing will vary slightly depending on your oven, baking sheet and cookie size, so watch the cookies rather than obsessing over the clock.)
After the initial 6 minutes, the cookies bake for another 7-8 minutes with two drops during that time.
How to Know They’re Done
Look at the edges.
They should be golden, thin and set, while the centers should still look soft and slightly underdone.
Don’t wait for the entire cookie to look fully baked in the oven. The cookies will continue to set on the hot baking sheet as they cool.
If you’re using flaky sea salt, sprinkle a little over the cookies while they’re still warm.
Let them cool on the baking sheet for several minutes before transferring them to a cooling rack.
EXTRA NOTES:
The Chocolate Matters
I prefer chopped chocolate rather than standard chocolate chips here.
Chocolate chips are designed to hold their shape. Chopped chocolate gives you irregular pieces—tiny shards that melt into the dough and larger pieces that become gooey pockets.
Semisweet gives you that familiar chocolate-chip-cookie flavor. Dark chocolate gives the cookie a little more bitterness against the caramelized brown butter and sugar.
Use whichever you’d actually want to eat.
Why the Extra Egg Yolk?
The additional yolk adds richness and chew without adding as much water as another whole egg would.
That’s particularly useful here because we’re deliberately encouraging the cookies to spread while still wanting that center to remain soft and satisfying.
Troubleshooting Your Ripples
My cookies aren’t spreading enough.
Your dough may be too cold, your flour may have been packed too heavily, or your oven may be running cool. The cookies need to spread before the pan-banging can create pronounced rings.
My cookies spread everywhere.
The dough may have been too warm going into the oven. Give the remaining portions a short chill and try again.
I dropped the pan and nothing happened.
Wait until the centers are visibly puffed. You’re collapsing trapped air. If there’s nothing to collapse yet, you won’t get much of a ripple.
My cookies are crunchy all the way through.
Pull them sooner. We’re looking for deeply golden edges with a center that still appears a little underdone.
I only got one or two ripples.
That’s okay. Different ovens and baking sheets produce slightly different results. Let the centers puff again between drops rather than banging the pan constantly.
Can I Make the Dough Ahead?
Yes. You can portion the dough, cover it well and refrigerate it before baking.
Because cold dough spreads differently from freshly mixed dough, let very firm refrigerated portions sit at room temperature briefly while the oven preheats. You’re looking for dough that’s cool and firm but not frozen-solid.
Storage
Store completely cooled cookies in an airtight container at room temperature for approximately 3 days.
You can also freeze portioned cookie dough for future cookie emergencies—which are real.
Freeze the portions on a sheet pan until solid, then transfer them to an airtight freezer container or bag.
One Last Thing
Don’t be timid with the pan.
You’re not gently tapping it.
You’re trying to collapse the puffed center so the dough spreads outward and leaves a ridge behind.
Drop it like it’s hot.
Sorry. I had to. 😂